It’s been a while since I have been able to play around with a project, but I needed a way to feed the dog without being there to do it for a couple of days and the auto feeders were all for small dogs which wouldn’t do for the tiny great dane we have. So, here’s the list of materials:
- 3″ PVC DWV Hub x Hub x Hub Sanitary Tee
- 3″ PVC PIPE (less than a foot just to connect fittings)
- 3″ 45° PVC Elbow Socket
- 3″ PVC drain cover (shower drain cover)
- 3″ to 2″ Reducer Bushing Spigot x Socket
- 2″ Plug (couldn’t find a link online)
- DC 12V 0.07A 3.5RPM High Torque Gear Box Electric Motor 37mm
- 2 Five gallon buckets
- Auger drill bit for drilling holes in the ground for planting bulbs
- a bowl of to receive the food
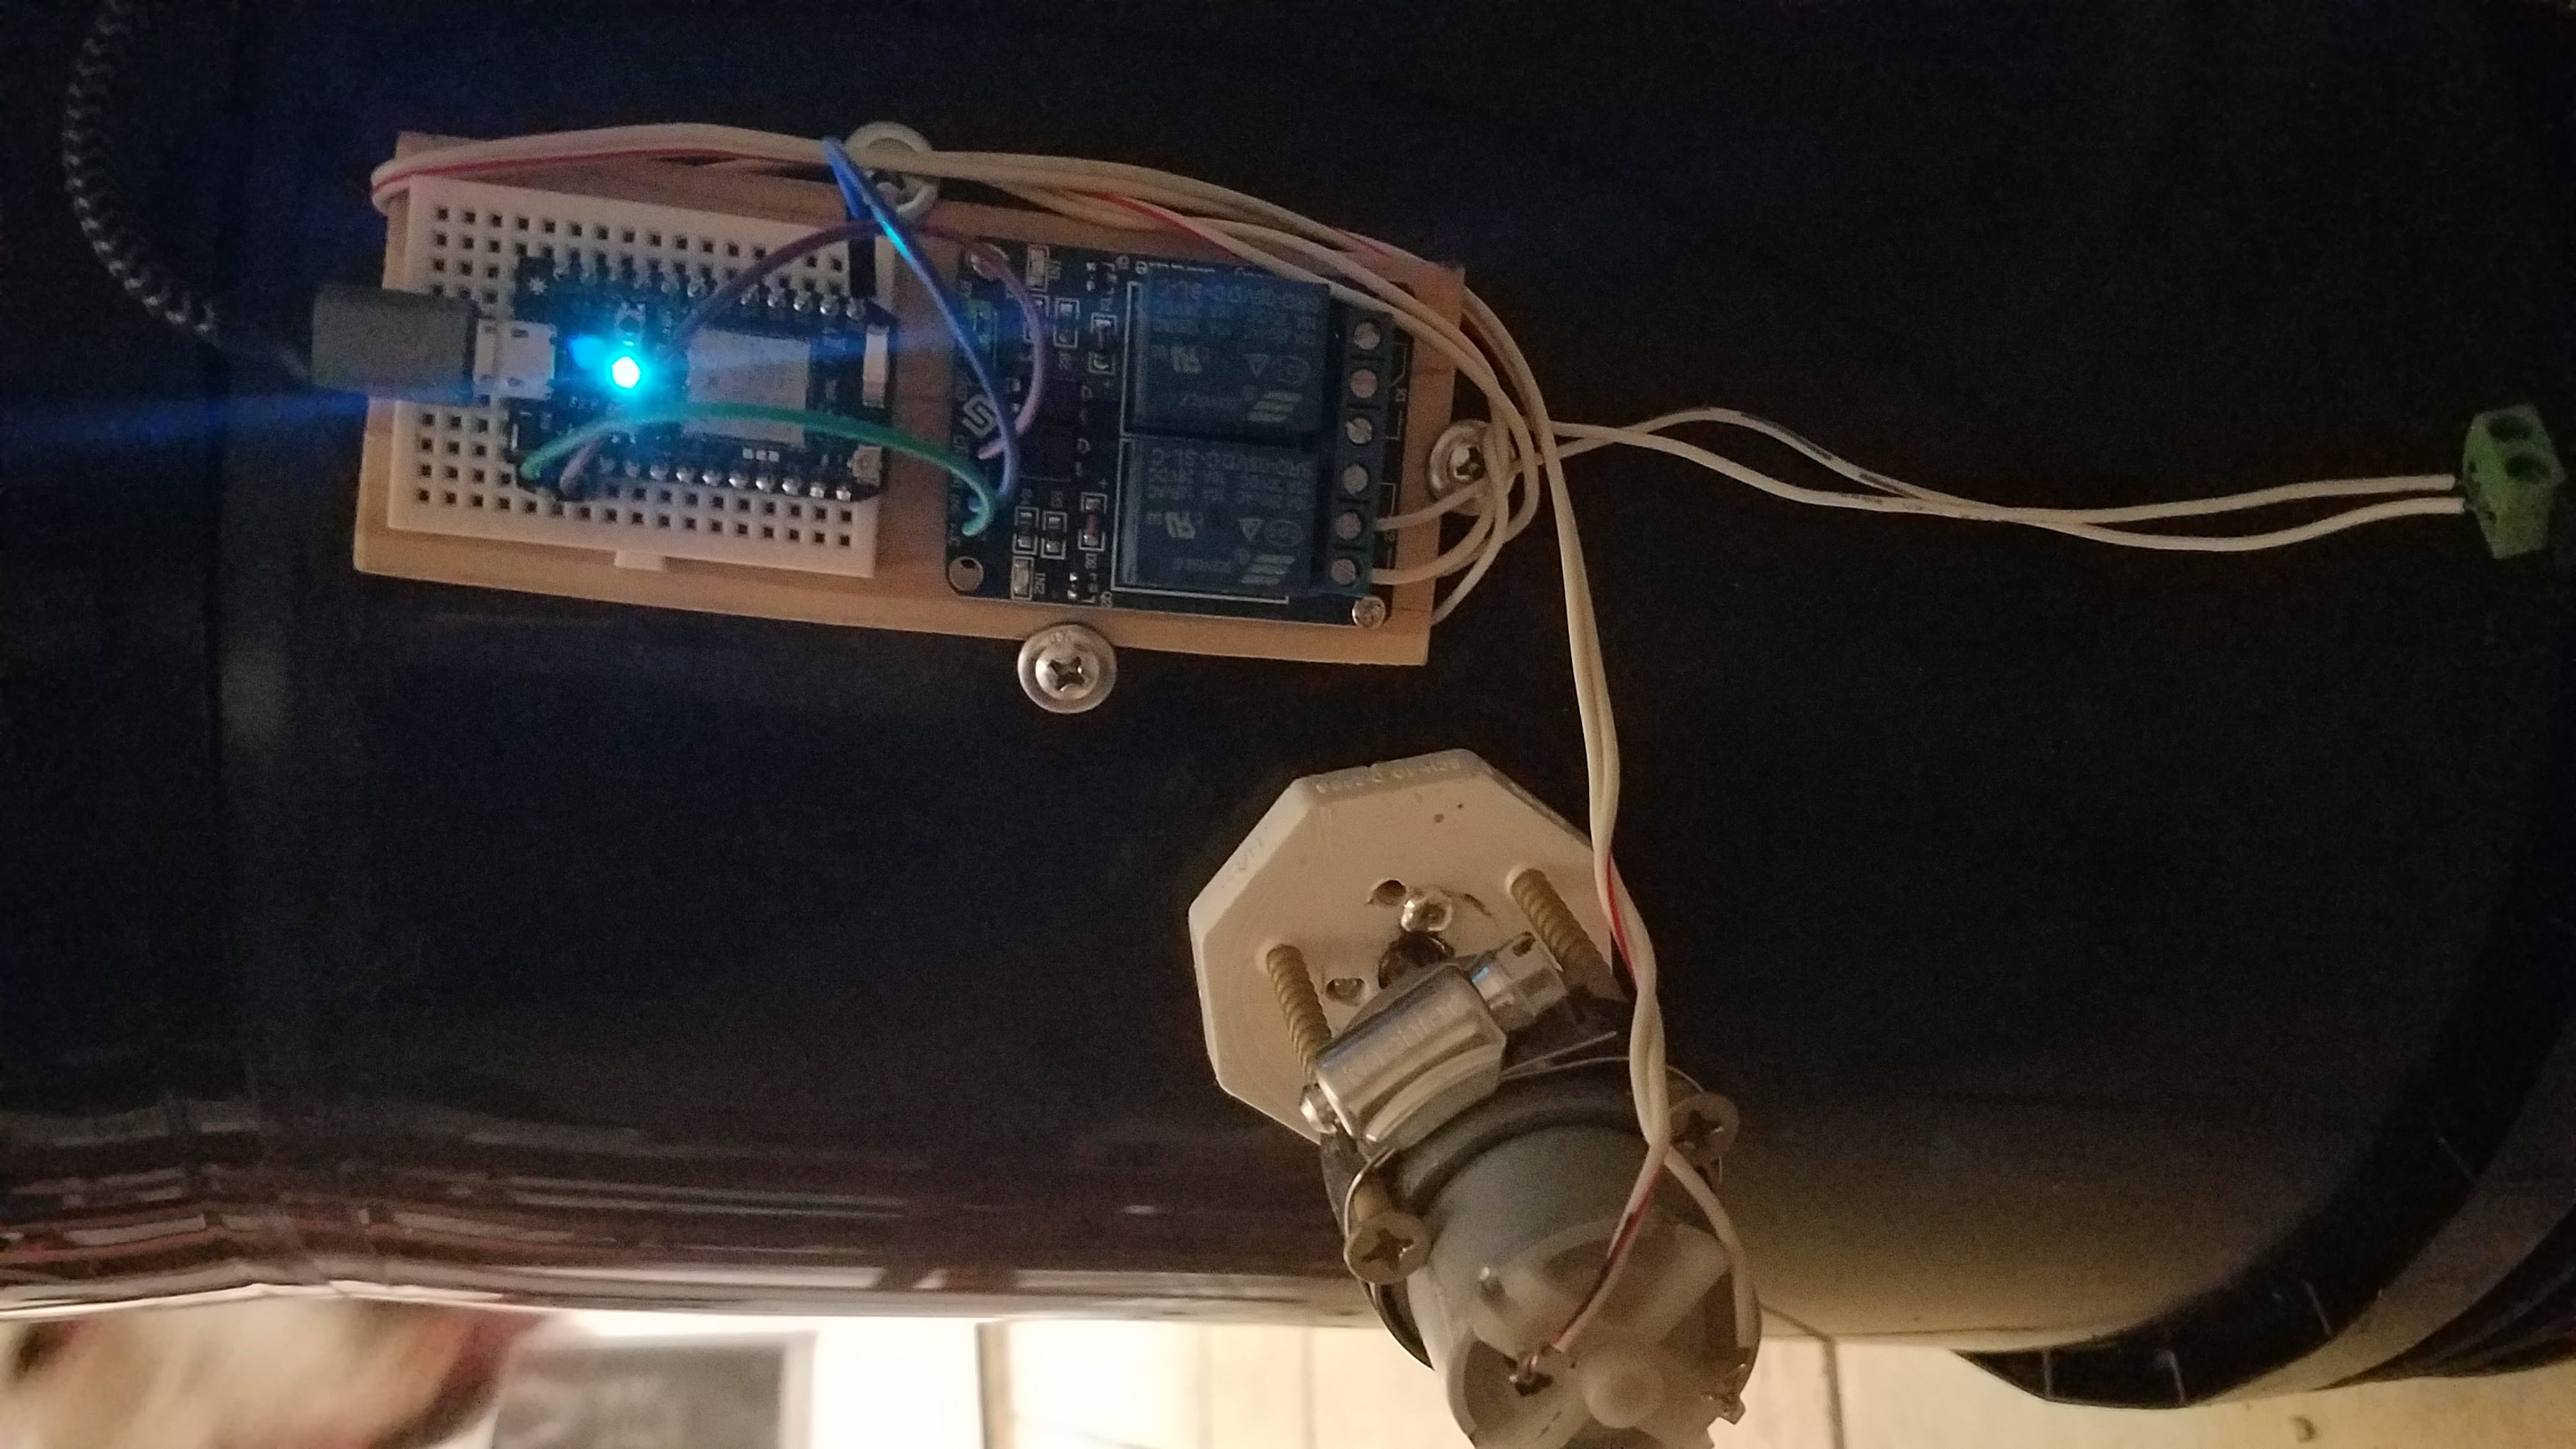
- Particle photon
- 2 relay board (you could use a single relay for this project )
- 12v power supply for the motor
- 5v power supply for the photon
(After all was said and done I figure the cost to be around $60.)
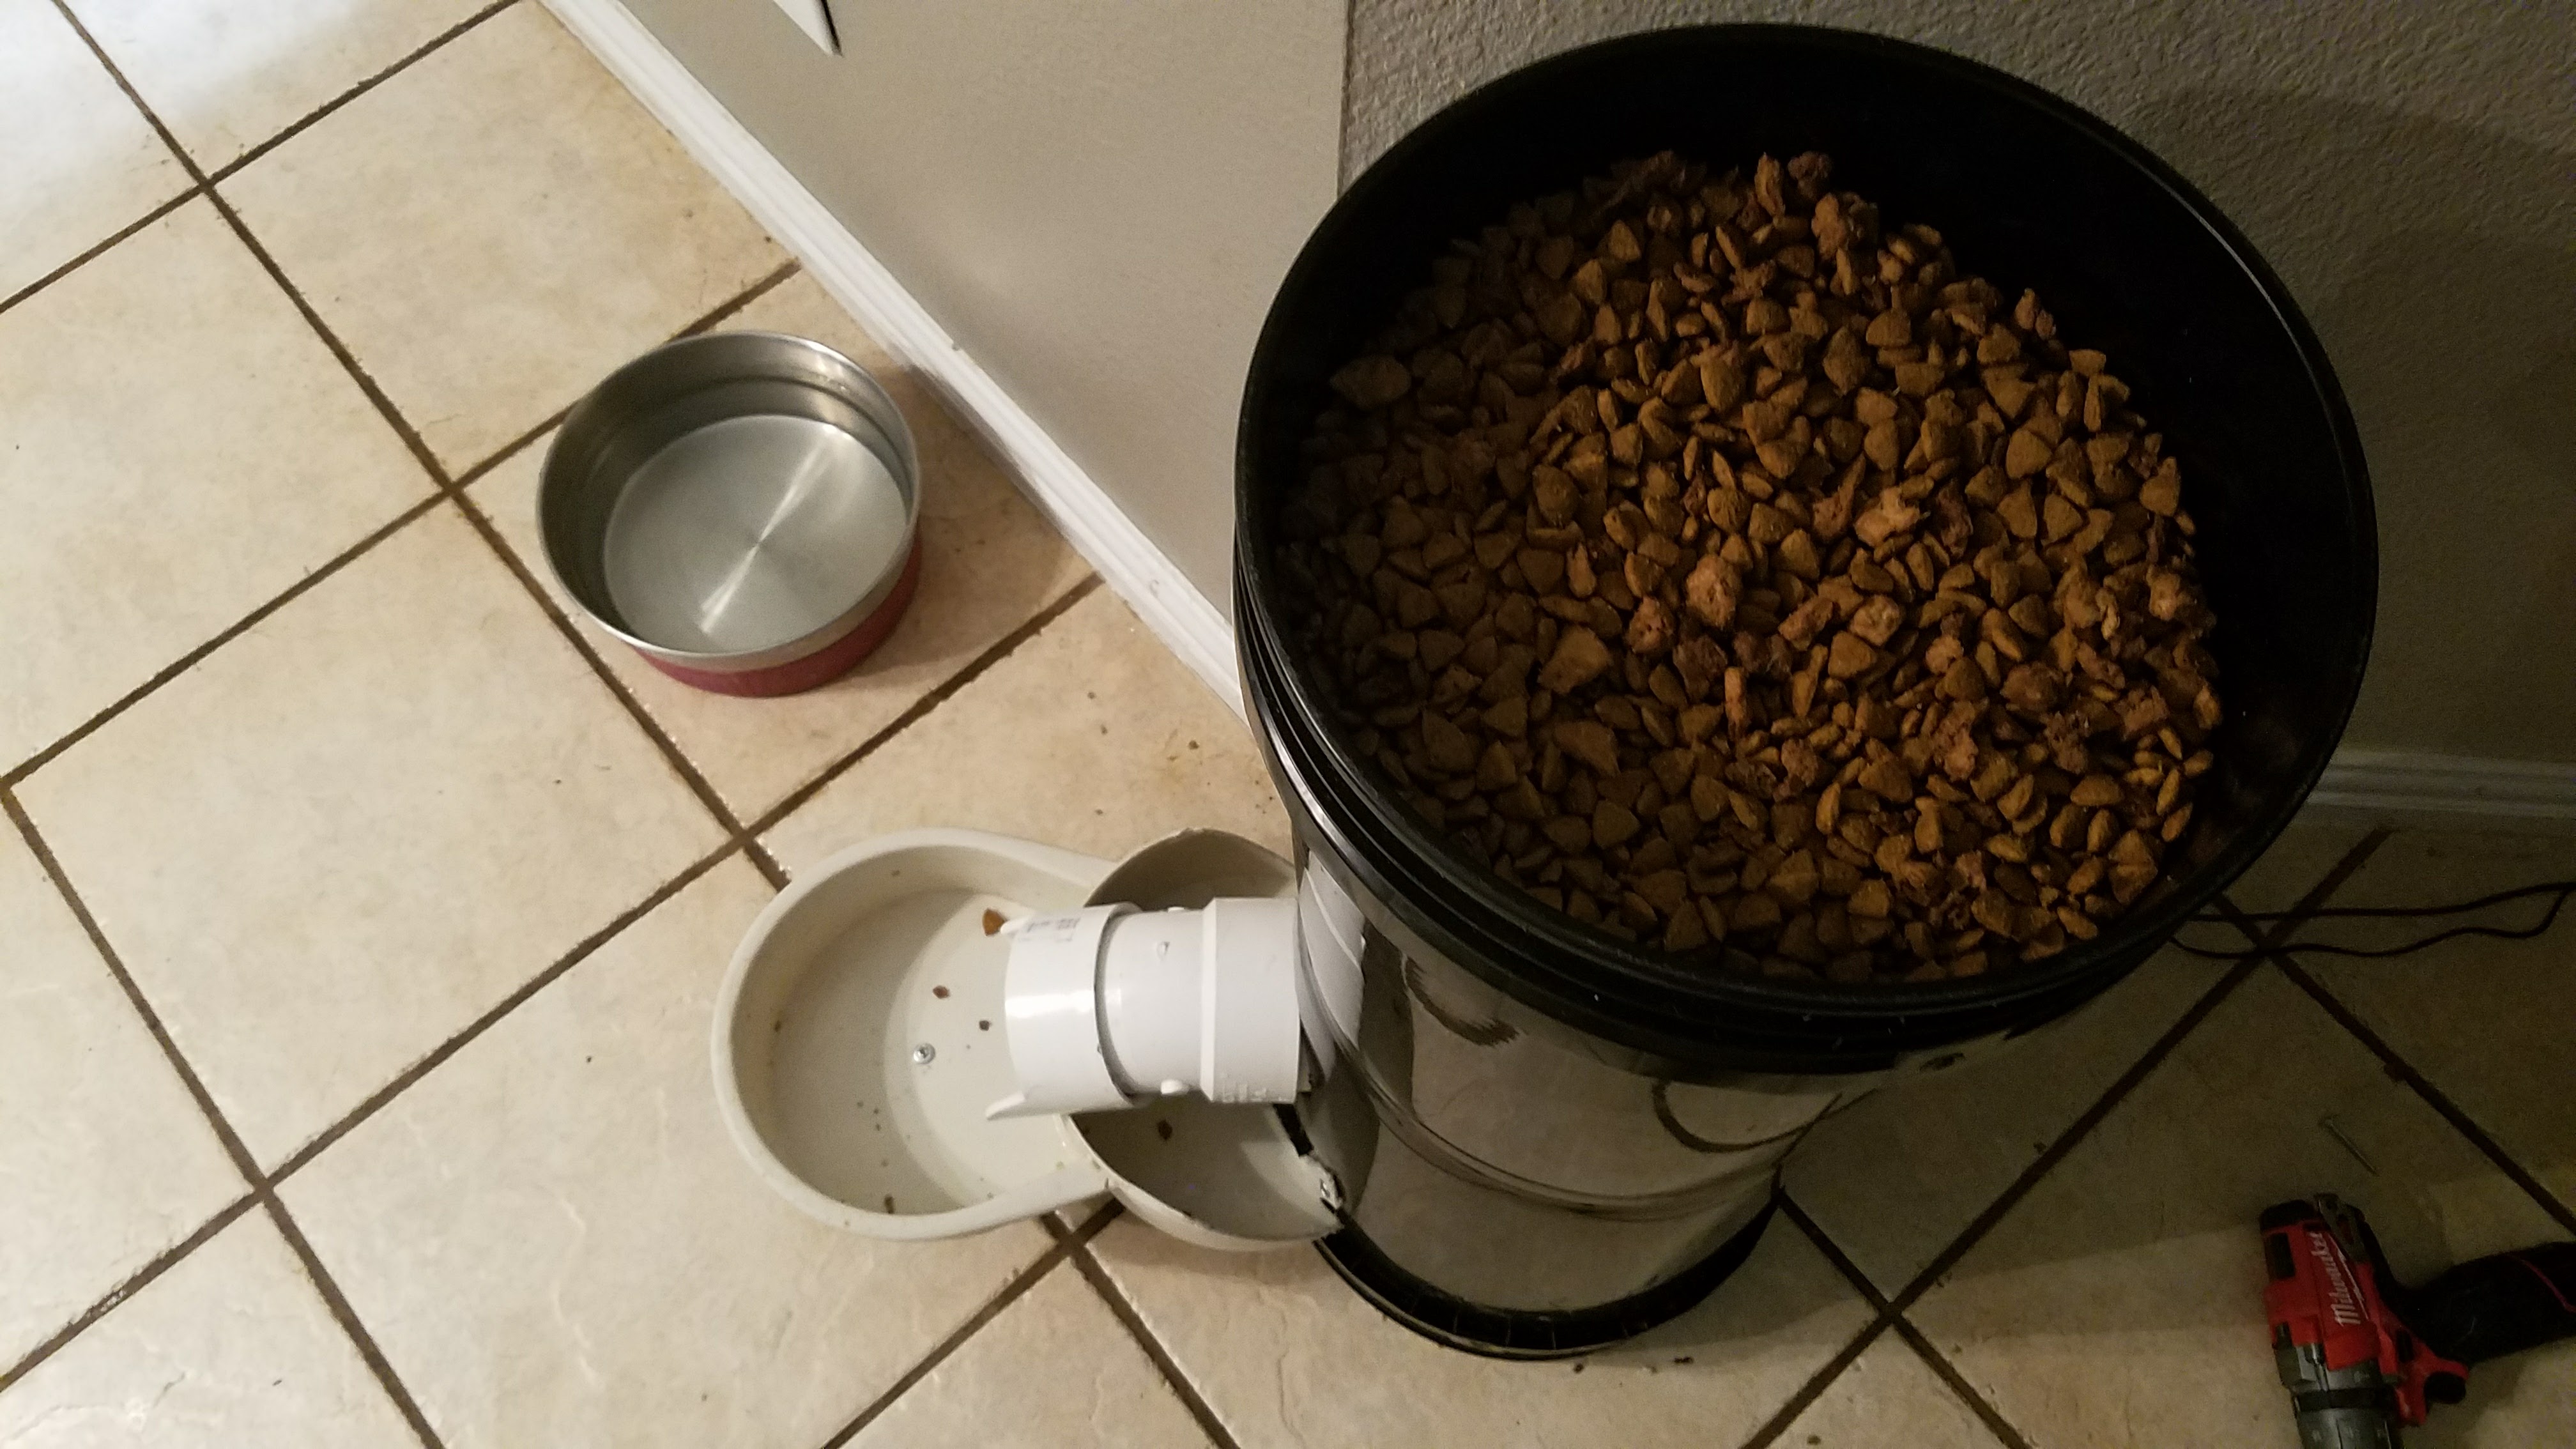
I used a hole saw to cut an insert from wood that would fit into the 2″ plug to help give the auger some stability in the pipe. So the space inside the plug is full of wood now. Next I drilled a hole of 11/32 in center of the plug to pass the auger through. The auger then needed to be attached to the motor. You can figure this part out for yourself as I am not sure I did it the best way (I drilled a hole into the auger that fit the motor axle, then I used a torch and soldered the motor axle inside the auger shaft). When this was done, I put the 2″ plug into the 3″-2″ busing and that into the pipe.
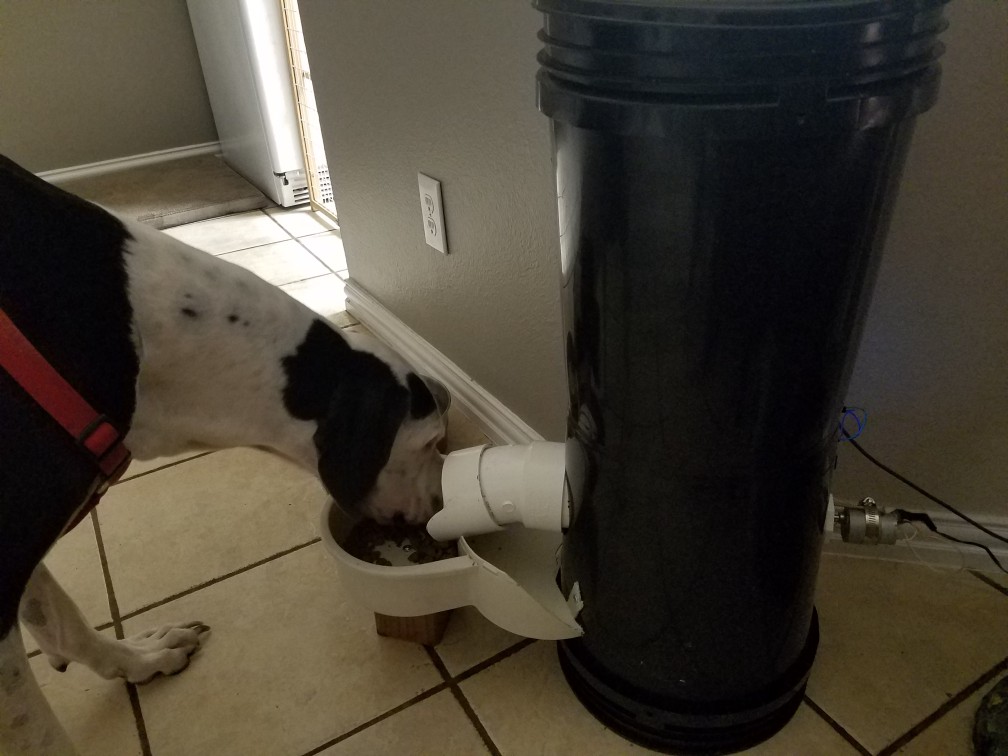
I cut a hole in the bottom of one of the buckets (top bucket for the food) the same size as the inside of a 3″ socket and cut the grates out of the drain cover. Then inserted the drain cover through the bucket and into the sanitary tee fitting essentially attaching the bucket to the pipes. I then cut a hole into the bottom bucket large enough to fit the sanitary T a small hole on one side to slip the motor though and on the other a larger 3″ hole to fit the other end of the T where the food is dispensed. I think slipped the T down into the bottom bucket and the motor through the small hole I cut in the side of the bucket for it. The 45° elbow was then added via some pipe to the T through the other side of the bucket and I added a 3″ coupler with part of the top cut off to add some overhang for the dispenser.
The code for this was really simple, we feed her twice a day, so the main loop of the program looks like this:
void loop()
{
//PUT YOUR LOOP CODE HERE
relay1Pulse(“pulse”);
delay(54000000);
relay1Pulse(“pulse”);
delay(32400000);
}
The relay1Pulse is from my other projects and is as follows:
int relay1Pulse(String command){
digitalWrite(relay1,LOW);
delay(48000);
digitalWrite(relay1,HIGH);
return 1;
}
The pulse time of 48 seconds is the perfect amount of time to give 2.5 cups of food per pulse.
So, really this was more of a hardware challenge than a coding one, but hey, it was fun. Hope you enjoy and please add any ideas you have to the comments below.
Here is a short video of it working: